 |
Former Dental Nurse breaks ranks to reveal the frightening truth about teeth whitening products >> READ HERE! |
For a dental students tooth carving is one of the first difficult task which he/she encounters in dental school. I faced same problems when I was a dental student but I loved tooth carving because I knew about the fact that tooth carving is basic step in building the dexterity required to become a successful dentist.
Today I'm writing down all my tips and learning in point wise and summary fashion. You may not find this in any dental books online or offline in this way. But most important thing is that-
it requires attitude and commitment to learn this art.
it requires attitude and commitment to learn this art.
STEP 1. Read and understand the tooth anatomy
1.Before your guide gives you the demonstration- first thing you must do is read the anatomy of that tooth. If you will go empty mind its difficult to absorb anything from demo.
2.While reading the anatomy make point wise notes of the each surface of tooth. Facial, lingual, Mesial etc.
3.My favorite book for dental anatomy is Wheeler's Dental Anatomy, Physiology and Occlusion
4.Don't rely on memory keep this notes and Wheeler's book beside you while you are carving the tooth.
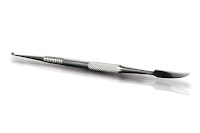
STEP 2. Get proper instruments
 |
2.A Metal scale ruler is best for measuring dimensions, vernier caliper can also be used for perfection.
3.Take good quality of carving wax it should neither be too soft or too hard. too soft will be distorted and too hard will be difficult to carve.
STEP 3. Keep an ideally carved tooth in front of you
Ask some one like your teacher or fellow classmate or senior who are good at carving to do an ideal tooth carving for you,
This have two benefits-
1. You have an Ideal carving to look and learn,
2.You get a extra demo when you see your friend or senior carving the tooth. If no body is there to carve for you then get an Extracted tooth.
Step 4. Start Carving
1.At the time when you start carving you should have good understanding of the anatomy of the tooth.2.Start with gross carving of different surfaces - starting with facial then lingual, then mesial and distal, occlusal being the last.
3.While doing the gross carving keep measurements 1mm greater then what is needed this 1mm will be used in fine carving and finishing.
4.After doing the gross carving, go for the fine carving for producing the details
5.Wipe the finished tooth with a piece of gauze. be careful not to apply pressure.
Step 5. Remove Distraction & Concentrate
1.Find a comfortable place where there is least distraction.Carving needs lots of concentration,observation and learning don't take it casually.
Step 6. Do Imaginary carving
1.Just take a wax block and carve what ever comes in your mind, keep a model in front of you or just imagine and carve a sculpture.
2.This need not to be perfect or amazing,
3.I'm asking you to do this because it have following benefits.-
You don't have to be perfect or follow any measurement so you carve with more relaxed mood.
It will keep up the interest of carving.
You start to learn the properties of wax- how much pressure to apply and how to remove and cut wax. what to do what not to do. its a basic process of learning.
Bonus Tip no 7: Practice, Practice, Practice
Keep on trying and practicing to carve, It can not be mastered in one day,
More you carve better you get.
When you practiced enough with certain tooth, help your friends if they ask for it, Don't carve to complete their quota but give them demo and share your learning.